
Iris Origami
If you're ready to print your Iris (Shobu) Origami, Click Here.
For more origami projects, Click Here.
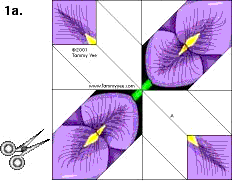
1a. Cut out image along outer solid lines.
b. Fold along diagonal line A as shown.
c. Fold in half again, along vertical line marked in red.
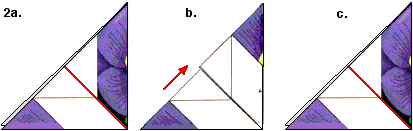
2a. Note diagonal line, marked in red.
b. Fold up along diagonal line.
c. Unfold.
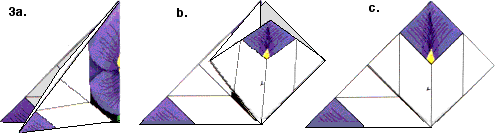
3a, b & c. Carefully open upper "flap" along creases to form a diamond, as shown.
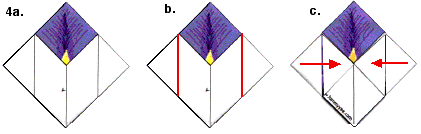
4a. Repeat steps 2 and 3 on the reverse side, so that both sides resemble diamonds.
b & c. Fold along the red lines so that the corners meet at the center, as shown.
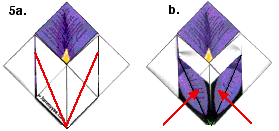
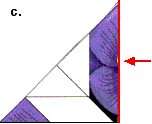
5a. Fold along red lines,
b. toward the center so that your origami appears as shown. Repeat on the reverse side.
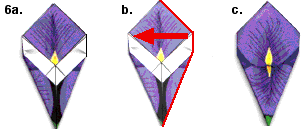
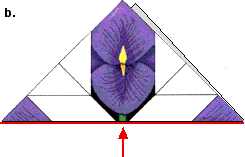
6. Fold right side of origami over so that the picture of the large flower petals is showing. Repeat on reverse side.

7. Fold inner petals down as shown. Now your origami iris is pau (finished)!
Copyright ©2001 Tammy Yee. All rights reserved.
No portion of this website may be reproduced without the prior written consent of the author.
Menu:
The Keiki Page / Coloring / Javascript Games / Origami / Puzzles To Print / Turtle Talk / Keiki Links / Hawaii Schools / Home